Are you currently operating a local business and want to expand online? Do you want to learn how to create an eCommerce website?
In this article, I will cover everything there is to know about creating an eCommerce website.
Normally, I would recommend WordPress, but I’m going to use Shopify in this tutorial. Without further ado let’s get started!
Step #1. Research For A Domain Name
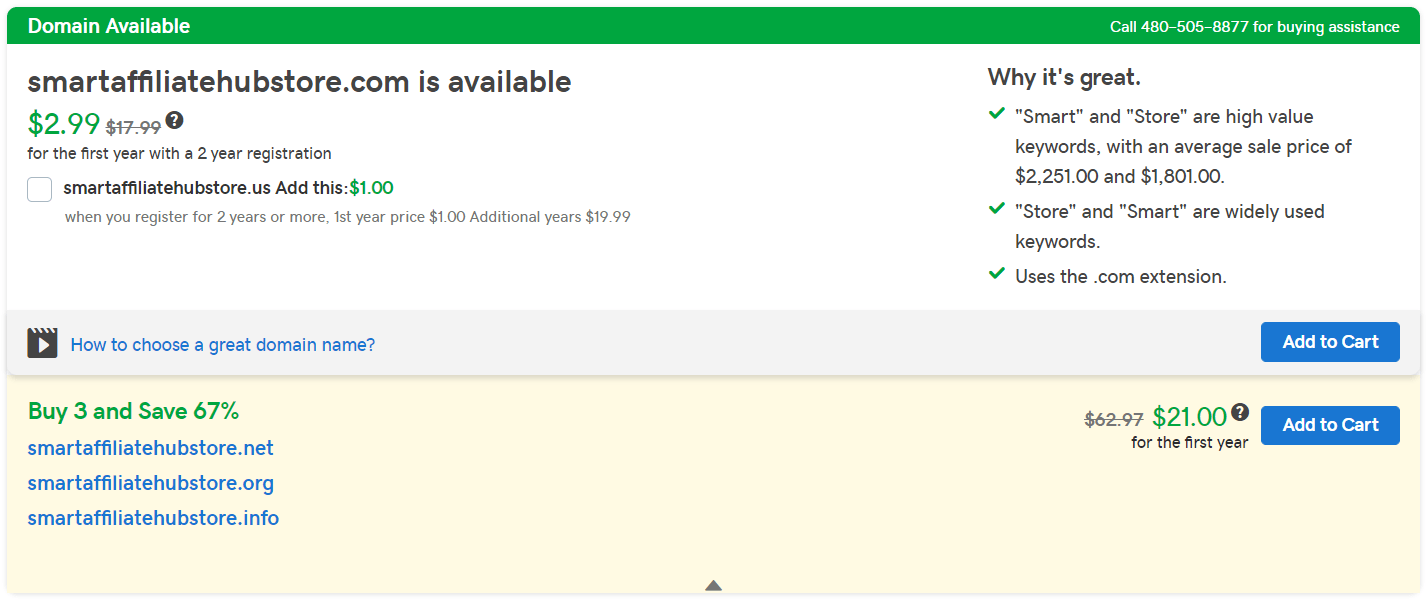
Before we begin, I want you to register for a domain name. Your domain name is basically your company’s name, so you want something easy to remember. Here’s a tutorial on how to choose a domain name.
This is far easier if you’re just starting a new company because sometimes your company may have already been registered by somebody else.
So if you are a start-up company, you can take this time to search for a brandable domain name before actually naming your company. You don’t want to come up with a name just to find out that the domain name is not available.
Personally, I prefer going to GoDaddy (domain registrar – the company that registers domains on your behalf) to check and purchase domain names. Here’s my tutorial on how to buy and choose a domain name on GoDaddy.
Note: Now I don’t want you to purchase the domain just yet. Just research for domains that you like.
Shopify also has the option of buying your domain and configuring it, so you don’t have to worry about setting it up.
Step #2. Sign Up For Shopify Free Trial

Once you’ve figured out what you want your domain to be, head over to Shopify. Shopify has a 14-day free trial, so you can try it out before committing yourself to it.
Now you’re probably wondering why I chose Shopify in this tutorial instead of other platforms and WordPress. In my opinion, Shopify is the best for managing and building Ecommerce websites.
It comes with far better features, price, room for growth, and ease of use compared to its competition.
Before I decided to write this article, I had a friend who wanted to start an eCommerce store and Shopify was the first that came to mind.
Also, Shopify does not require payment information to access their free trial. Which means you don’t have to worry about getting charged if you forget to cancel.
Then again, if you’re serious about starting an eCommerce store, you’ll probably stick with Shopify anyway.
Step #3. Purchase Your Domain On Shopify
After you’ve created your Shopify store, you can go ahead and purchase the domain name that you found earlier on in this tutorial. It’s super easy to buy your domain name within Shopify.
If you are still indecisive, Shopify allows you to search for a domain.
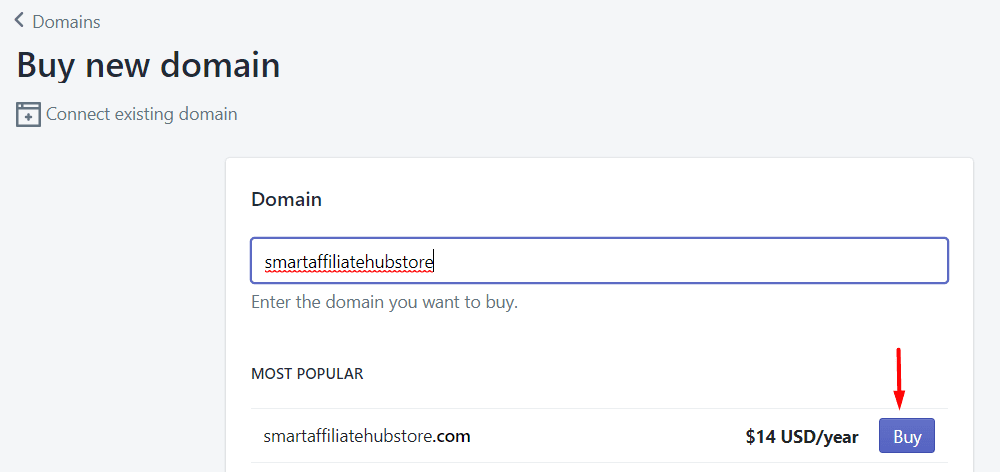
For $14.00 per year, you can have your own custom URL for your online store. I believe it’s slightly higher than the average registrar, but it will save you a lot of time when it comes to configuring it.
Step #4. Secure Your Website With An SSL Certificate
This is an extremely important step because your customers will be asked to fill out their personal information including payment information. Without a secured website with an SSL Certificate, most people will be hesitant to buy from you.
What usually happens is if your website is not secured, your customers may get warnings about your website which is not good for business. It’s pretty a requirement to have SSL for your Ecommerce website.
The good news is, Shopify gives you free basic SSL for your store. But there are different levels of SSL to consider with better security and insurance. The cost can range from a few hundred dollars to a few thousand dollars per year.
For now, you can just stick with the free basic SSL certificate that Shopify gives you. Like the theme of your website, you can always upgrade down the road.
Once you’ve purchased your domain, you can add an SSL certificate in your Domain area.
Step #5. Choosing Your Website’s Theme
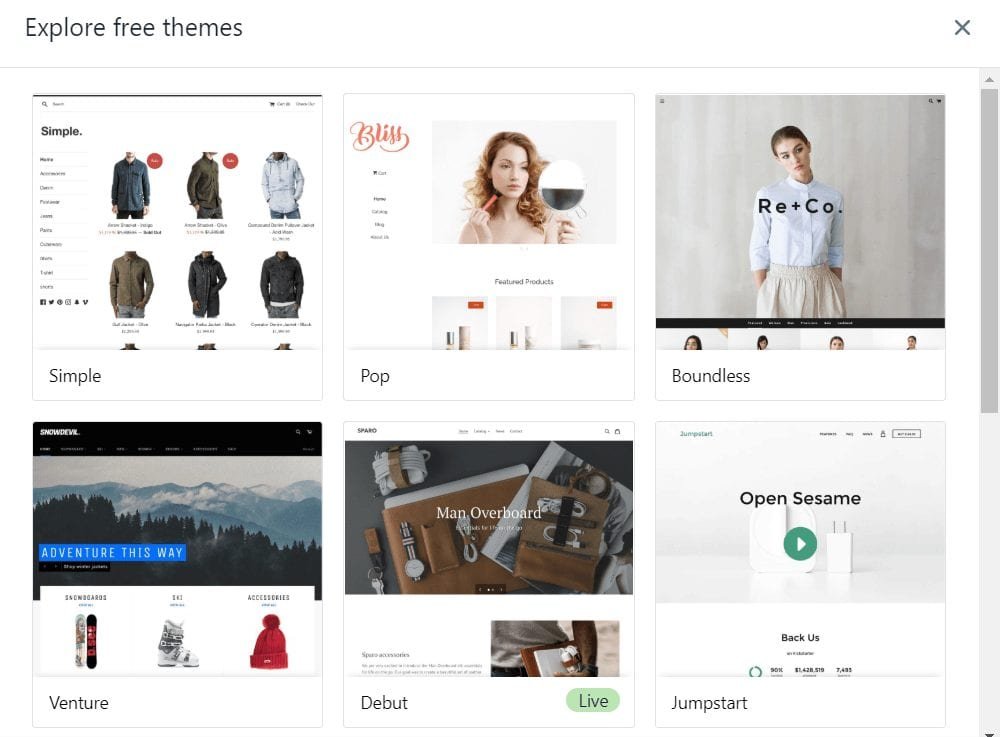
Your website’s theme is basically how your store will look. Fortunately, you don’t need to hire someone to do painting, crafting, etc. Like WordPress, there are various ways to get a theme.
The 3 ways to get a theme:
- Free Theme – Shopify comes with its own set of themes that you can use for free. In fact, it’s okay to start off with it because they look very nice.
- Paid Theme – If you want something that looks more premium with additional features, you can check out Shopify paid theme marketplace. Most of them sell for $180.00.
- Custom Theme – There are Ecommerce agencies that can help build your website from scratch. This is the more expensive method, but you get to have a fully customized eCommerce store. I recommend going this route after you’ve established yourself online.
What you should use as a beginner: For starters, you can simply stick with the free Shopify themes. That way you don’t have to spend too much money to get started. But once you’ve made a few sales, it doesn’t hurt to upgrade to the paid themes.
In the end, it all boils down to a theme that fits your company. For example, if you’re selling Halloween products, I would choose something that looks dark and spooky.
Once you’ve found the theme you want. Simply install it on your Shopify store and you’re good to go!
Step #6. Create Your Product Pages
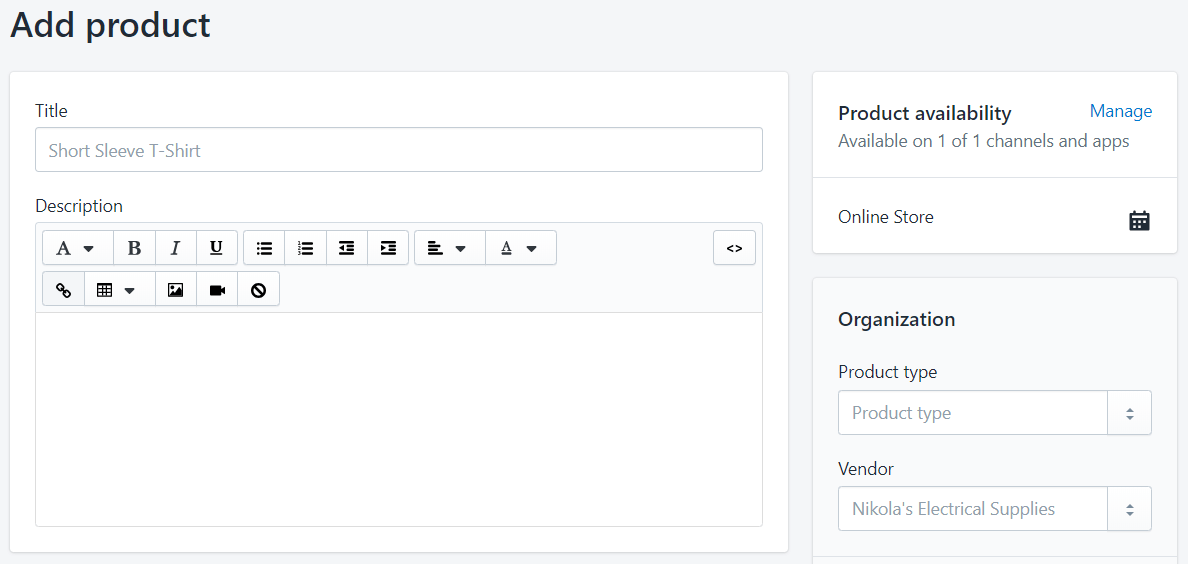
Your product page is the most important part of your eCommerce store. It’s where people spend the most time on. So I’m going to give you what I believe is important to have on your product pages.
- Product Name: Choose a name that is easy to remember and instantly speaks for the product itself. For example, PermaPlate. A tough wax used in the automotive industry that plates your vehicle and shields it from the natural elements.
- Product Description: The explanation of the product should be short and to the point. Nobody in the right mind is going to read an essay especially if they are shopping multiple products on your eCommerce store. Most importantly, explain the benefits of your product. What can it do for your buyers? You have to understand that people buy solutions and your customers are looking for a product that solves their problem.
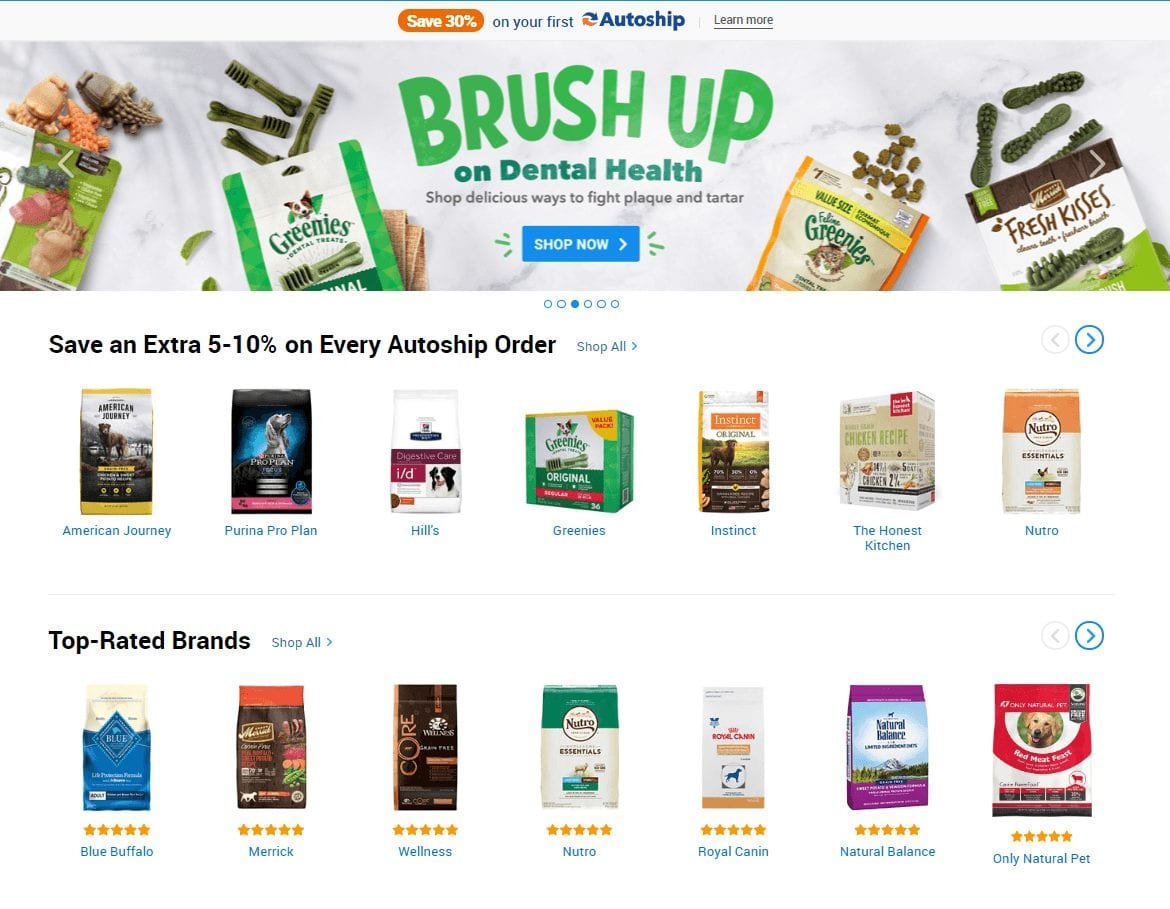
- Product Image: A picture is worth a thousand words. There’s nothing better than giving an image of how your product looks before your customer buys. When displaying your product images, make sure that you invest in a decent camera, and choose a good location for lighting. It’s almost like matchmaking, you want to give your best image, not your worst.
- Product Price: When coming up with pricing, what you want to do is compare your products with your competitors. What are they charging their customers for the same product? By comparing your products with your competitors, you can figure what is considered a fair price. If your product is better than your competition, you can increase the price a bit to justify it. But you can’t just make up a random number and hope to sell.
Step #7. Finish Completing Other Pages
Now I started off with the product pages because they are the most important. And with the product pages completed, it will make your homepage easier to create.
Homepage: Since I mentioned the homepage, I figure I’ll start here. Your homepage is basically the storefront to your eCommerce store. And since you’ve completed your product pages, you can actually feature your most popular products on your homepage.
By doing so, your visitors are always exposed to your most popular items. You can always update this as your store grows. But for now, choose what you think is going to be the most popular item.
Company About Page: This is a very crucial page to have. It allows you to tell your story and build a relationship with your customers. I would include information such as:
- When your company was founded and what made you start your company?
- What kind of goals do you have as a business?
- If you operate an offline store, where are they? Show the locations.
- What is your expectation when it comes to your product quality?
- How many people work at your company? Customer support is important if your customers have questions.
Just be honest and make it easy to read and understand.
Contact Page: Make sure you list your companies phone number, address, email addresses, etc. If you have live support, make sure you include live chat buttons or a simple contact form.
The point of a contact page is so your customers can get in touch with you. So make sure whatever you put in your contact form is being actively monitored.
The faster your response time, the better off you’ll be at retaining a customer.
If you are just starting off and you’re the only person working on your eCommerce website. Make sure you have all emails sent to you and that you monitor regularly.
Since you’re running a business, you should also set up a business email using the same domain as your website. For example, my email address is eric@smartaffiliatehub.com.
Eventually, you’ll want to outsource for help to handle customer support.

Lastly, if you are not comfortable with giving away your personal cellphone number, you can use services like GoDaddy, SmartLine for $3.99/month.
SmartLine will enable you to use your own phone and have your business phone calls get redirected straight to your personal cellphone. This allows you to respond to any of your business calls without having to give up your personal phone number
Step #8. Set Up Your Payment Methods
Again, one of the biggest reasons why I recommend Shopify for Ecommerce is how easy it is to set up your payment methods. All you have to do is configure a few settings and tell Shopify where to send your money.
Simply click Settings > Payment Providers > and complete the setup.

Click complete account setup and fill in the required information such as your business info, personal info, bank info, etc. This will allow Shopify to transfer money to you.
There’s a section called Customer Billing Statement that you have to pay extra attention to:

You want to make sure the statement descriptor is clear, so your customers know what the purchase was for if they decide to check their billing statements.
Not only is it protection for them in case of unauthorized transactions, but it will also reduce the likelihood of you getting a chargeback. This can happen when the customer forgets about what they bought and doesn’t recognize the transaction in their billing statement.
Also, make sure you set up a PayPal business account for your website. Most customers prefer to use PayPal because they don’t have to enter their credit card information.
Personally, I use PayPal checkout as often as I can. I hate having to take out my wallet just to get my credit card information. Once you’re done, just wait for your first sale and PayPal will email you to set up your merchant account.
Step #9. The Big Day Is Coming, Launch Your Store
Congratulations, you are almost done!
Now that you have everything in place, it is time to launch your new eCommerce store.
By default, your Shopify stores are password protected. This means, no one can see your store unless they have your password.

How other people see your website for now.
So what you want to do now is to remove the password protection, so they can see your store without being asked to enter a password. This step will require you to pick a plan. But don’t worry, you’ll still get your free trial. The billing period won’t begin until after the trial period.
If this is what you want to do, make sure you select a paid plan, otherwise, you can’t launch your eCommerce store. You can still cancel before the billing period if you decide to not do this.
Click on the eyeball icon next to the name of your store on the left side and select preferences.
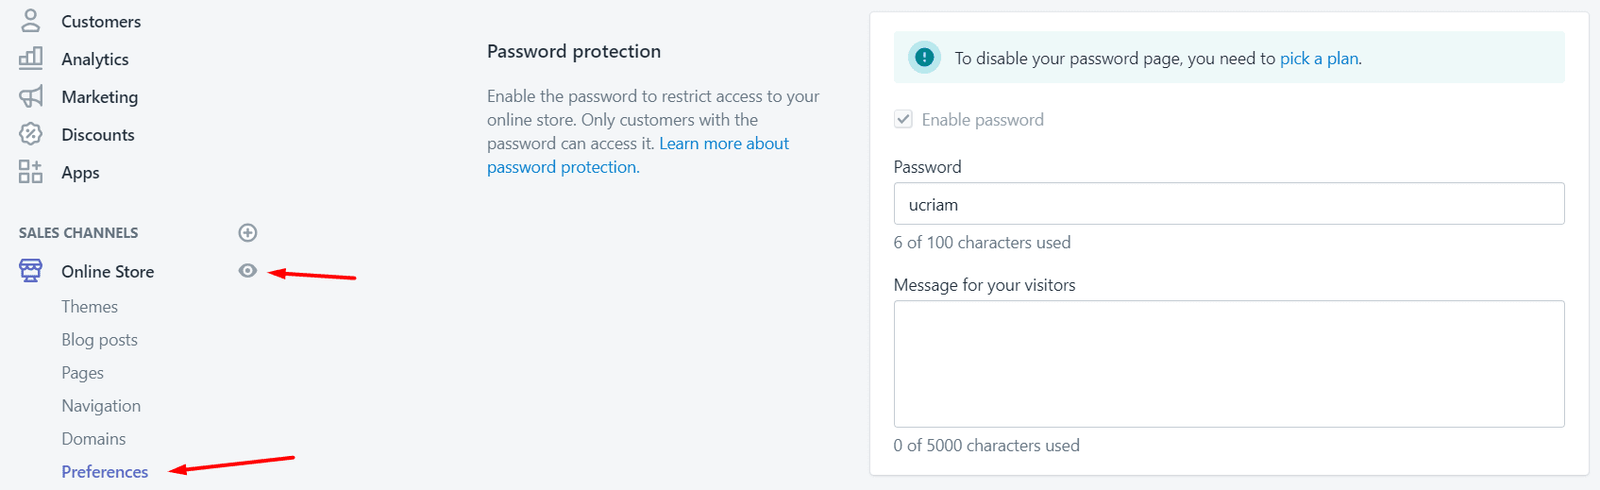
All you have to do is uncheck the Enable Password Box and save settings. Once you’re done, your store will be officially released to the public.
After that, it is up to you to grow your traffic through content marketing, pay-per-click marketing, Social media marketing, email marketing, etc.
If you have any additional questions, please let me know by leaving a comment down below. Good luck!

